> For the complete documentation index, see [llms.txt](https://docs.starship.network/llms.txt). Markdown versions of documentation pages are available by appending `.md` to page URLs; this page is available as [Markdown](https://docs.starship.network/for-investor/how-to-join-community-sale-on-starship-a-step-by-step-guide/how-to-claim-tokens/how-to-claim-fan-card-and-tokens-from-fan-card.md).
# How to claim Fan Card and tokens from Fan Card
## How to claim Fan Card
**Step 1:** Login with your KYC-ed OneID and Connect wallet
Note: Make sure that you log in with the OneID you used before, and connect to the wallet linked to that OneID at the time of purchase. You can also check the address directly on the Starship page as below.
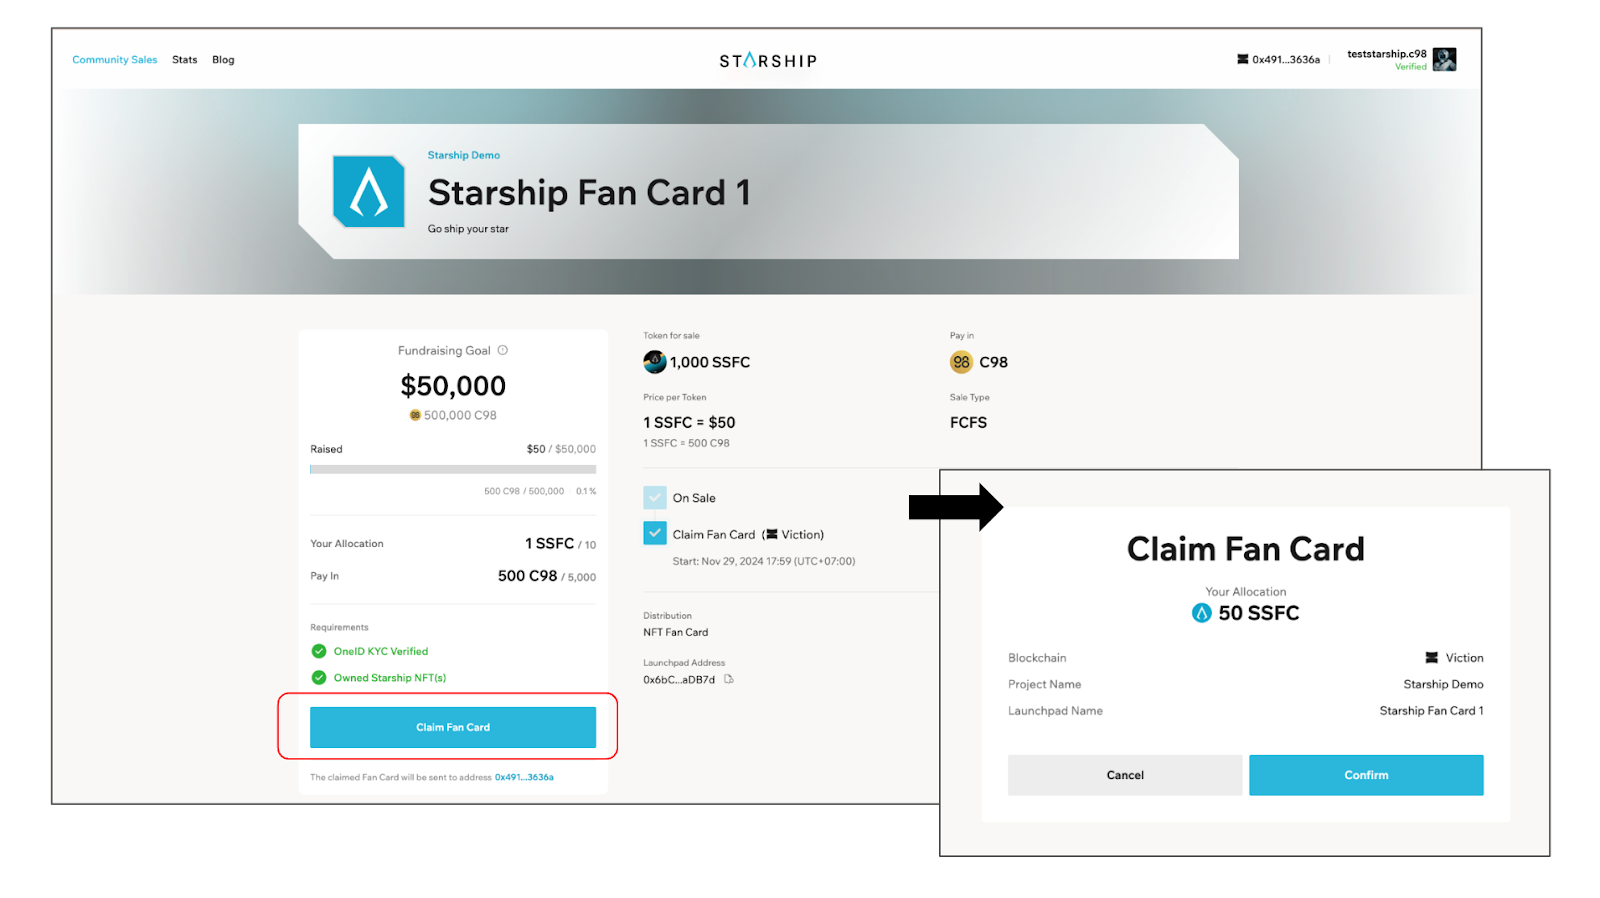
**Step 2:** Claim your Fan Card
At the claiming period, you will see the **Claim Fan Card** button.
Click on the **Claim Fan Card** button and confirm.
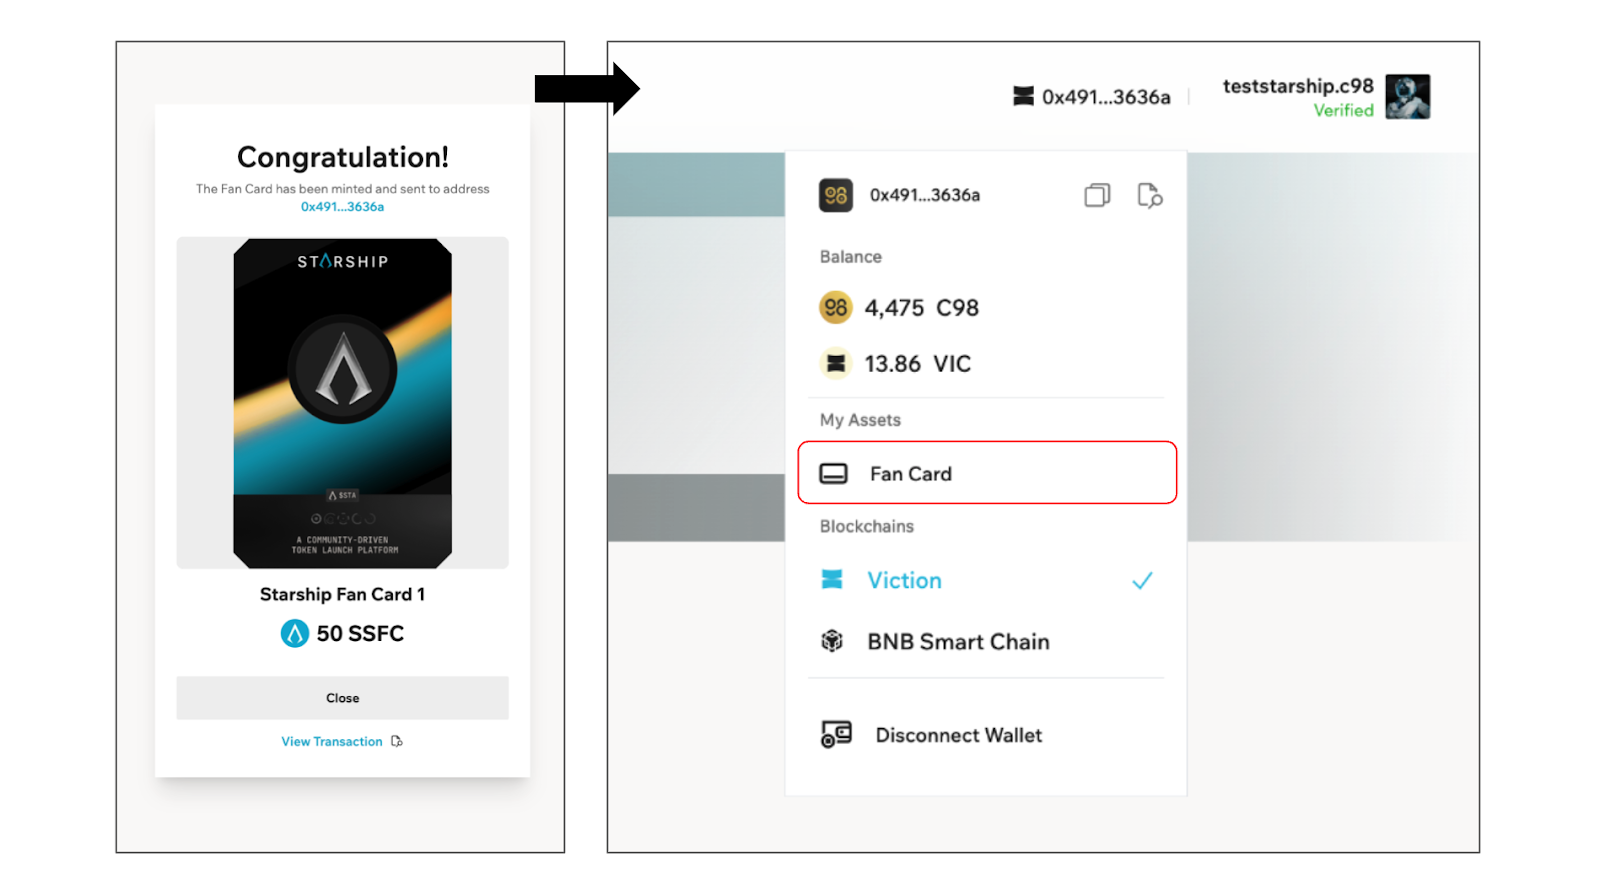
**Step 3:** Check your Fan Card
Once the confirmation process is completed, the Fan Card will be displayed on the “Fan Card” page.
Click on the connected wallet next to your OneID on the top right corner, click **Fan Card** to open the Fan Card page.
Fan Card is an NFT and is tradeble, you can easily list and delist your cards on Dagora.
Detailed guidelines to list your Fan Card at [Link: List - Cancel Listing NFT items on Dagora](https://docs.dagora.xyz/beginners-guide/basics/list-cancel-listing-nft-items).
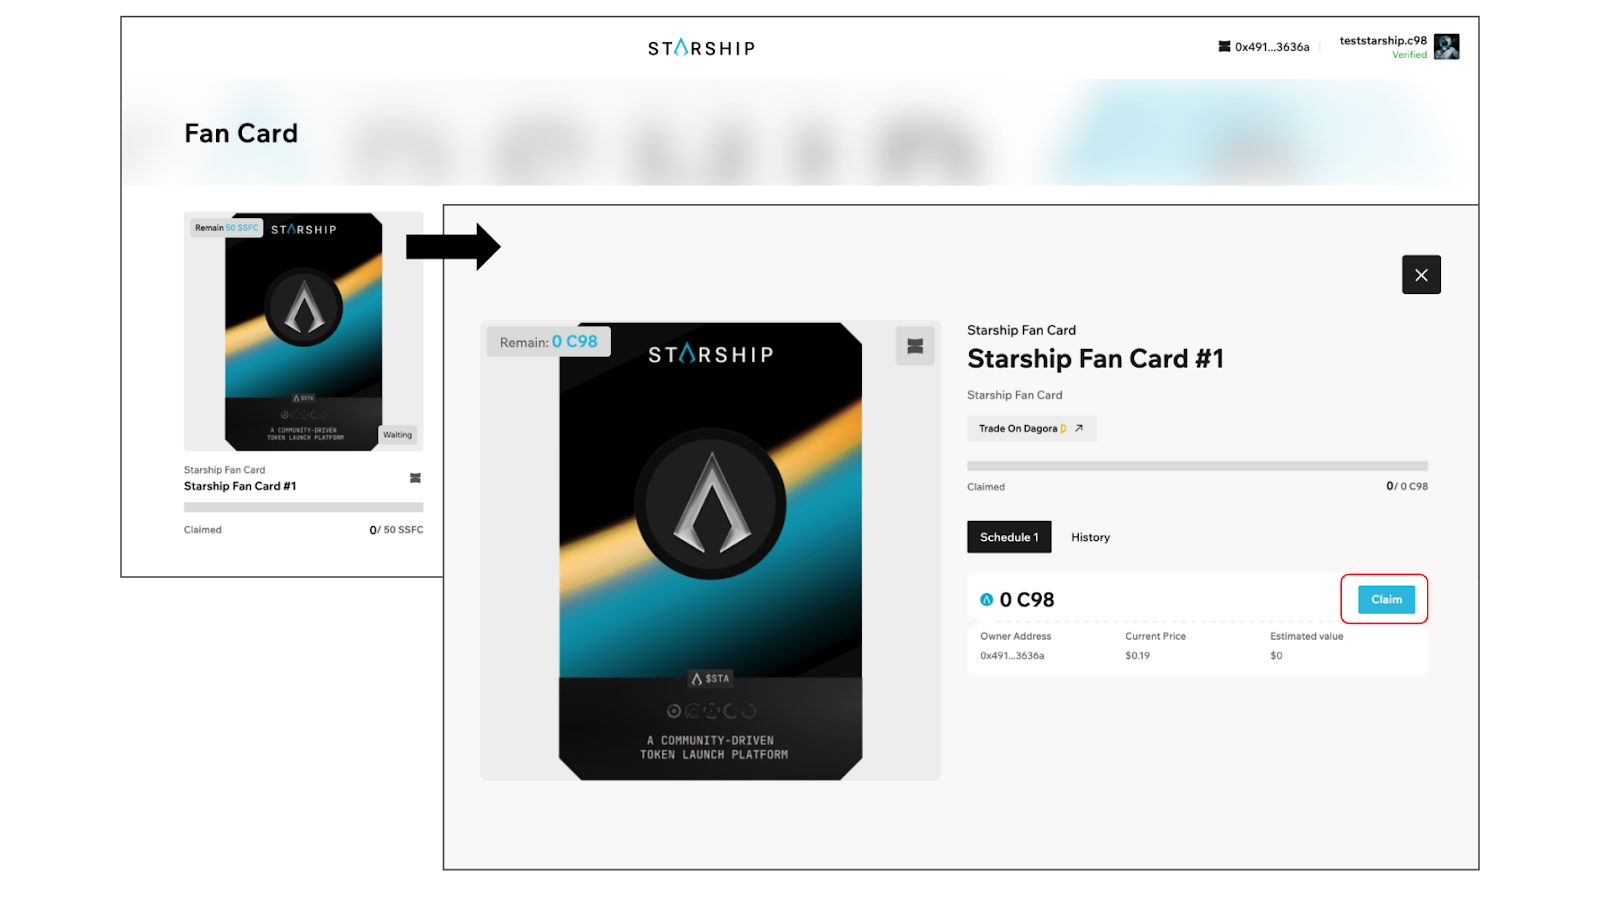
## How to claim tokens from the Fan Card
To claim token tokens with Fan Card, you must visit the “Fan Card” page and click on the Cards that are available for tokens claim. To have better navigation, it is recommended to search the project name or token symbol.
{% hint style="info" %}
**Note:** Make sure to prepare a small amount of native token for the gas fee.
{% endhint %}
Important note: If you purchased Fan Cards through Dagora or any other means outside of the original sale, you must link your wallet to OneID account, which has already [KYC-ed](/for-investor/how-to-join-community-sale-on-starship-a-step-by-step-guide/how-to-login-by-oneid/how-to-kyc-before-joining-launchpad.md), to claim tokens on Starship). Then the claimed tokens will be sent to the wallet holding your Fan Cards.
---
# Agent Instructions
This documentation is published with GitBook. GitBook is the documentation platform designed so that both humans and AI agents can read, navigate, and reason over technical content effectively. Learn more at gitbook.com.
## Querying This Documentation
If you need additional information that is not directly available in this page, you can query the documentation dynamically by asking a question.
Perform an HTTP GET request on the current page URL with the `ask` query parameter:
```
GET https://docs.starship.network/for-investor/how-to-join-community-sale-on-starship-a-step-by-step-guide/how-to-claim-tokens/how-to-claim-fan-card-and-tokens-from-fan-card.md?ask=
```
The question should be specific, self-contained, and written in natural language.
The response will contain a direct answer to the question and relevant excerpts and sources from the documentation.
Use this mechanism when the answer is not explicitly present in the current page, you need clarification or additional context, or you want to retrieve related documentation sections.